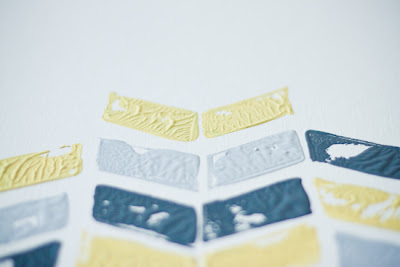
So, I have this wall in my living room that has been looking a little lonesome and awkward. Mostly because I have all of these awesome vintage frames from thrift stores hung on the wall... but most of them don't actually have any art/pictures in them.
A few weeks ago, and right before having baby #2 I decided it was about time to start filling the empty frames with a little homemade art. I have seen so many fun chevron inspired wall prints all over Pintrest and really wanted to do something similar.
I really didn't want to buy any art and I didn't want to have to run to the store for DIY supplies either. After spending a little time brainstorming, I remembered making 'art' out of cut up fruit and veggie stamps when I was a kid, and then realized that I could make my own "potato" chevron stamp!
The wall has made a little progress since, but as you can see it still needs a little help.
Click below to get my tutorial, it's super easy and tons of fun!
Potato Stamp Art
Materials needed
Paint
Paper plates
Scissors
Potatoes
Paper & paper towels
Blank canvas
Sharp knife
Step 1. Make your own chevron pattern by simply drawing a parallelogram (to desired width and length) by hand or on the computer. Cut out the pattern and pencil out where each stamp is going to go on your blank canvas. (or if you are very gifted you can just eyeball it).
Step 2. Grab a large potato and slice it in half long-ways. Then place the parallelogram pattern on the potato and cut around the pattern with a knife. You can make 1 stamp and re-use it, or make multiples for different colors like I did.
Step 3. Mix desired paint colors, and pour onto separate paper plates.
Step 4. blot some of the moisture out of the potato stamp with a paper towel. Dip the stamp into the paint and test out the stamp on a piece of paper.
Step 5. Begin to stamp your canvas!
Some of my stamps didn't have the crisp edges that I wanted. So, I would just take my stamp and rock the edges back and forth until I was satisfied with the shape.
Step 6. Allow time to dry completely, then hang where desired!


